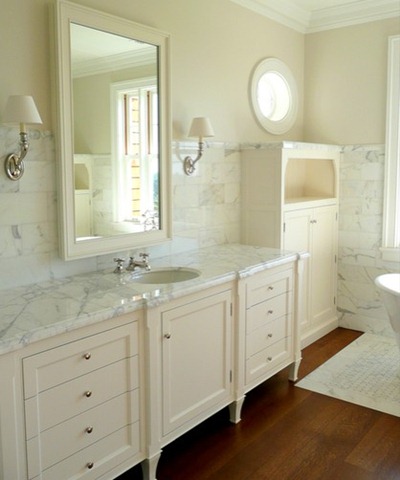
Showing posts with label Guest Bath. Show all posts

Function and Frilly in the Guest Bath

Sunday, December 6, 2015


It was a great day when the guest bath was finished, but most fun was adding all the fluff.
The train rack for holding the new white towels and wash cloths,
a ruffle edged shower curtain,
little glass decanters for holding Q-Tips and cotton balls,
and white fluffy rugs to keep the floor dry and toes warm.

But, there was one thing missing...a vanity stool.

There are so many styles to choose from and they are gorgeous, like these from Ballard Designs:
The Ava vanity stool ranges from $299-$524 and the Louis Stool ranges from $279-$377.

 Ava vanity Stool from Ballard DesignsLouis Stool from Ballard Designs

Are you gasping?
They are so pretty, but the prices...yikes!

So I headed out to do a little thrifting.
I searched and searched but kept coming up empty handed until I came across this $3 find...

Guest Bath ~ A Sweet Pair

Saturday, August 8, 2015


When I first found this little white dish, with a small bird resting on the side of a leaf, I thought it would be the perfect jewelry dish for the upstairs guest bedroom.  After finding some sweet smelling grapefruit soap I decided instead to use it as a soap dish in the guest bath.  They belonged together, this Jewelry Dish turned Soap Dish.

The other day, as a friend and I were strolling through a shop, I came across this white bird vase and I knew these two pieces would make a sweet pair in the guest bath.

Bird vase and dish make a great pair in the guest bath.

Guest Bath ~ Birds and Pink Grapefruit

Thursday, February 12, 2015


It was this little bird dish that first caught my attention.

A delicate piece that I thought would make a nice jewelry dish.

You know,
that piece on the dresser for placing rings, necklaces, and earrings that are worn daily,
and usually left on the dresser for use again the next day.


GUEST BATH ~ ROHL & FLITZ

Tuesday, November 19, 2013


There isn't much I would change about our guest bath.
We still have a few things to do, like finding a vanity stool and choosing what to do with the walls. 
Leave them painted as is, paint another color, or put up some wallpaper?
But we are happy with our choices so far.

We are especially happy with the choice to go with polished nickel for the lighting and hardware finishes
as well as the Rohl plumbing fixtures.


It is hard to take pictures of this room because of the size so the angles always look a little funny.
And wouldn't you know, the sun isn't shining today,
so the picture above is with the lights on
and
the one below is with the lights off.


The plumbing fixtures started out all bright and shiny,
and pretty much stay this way with occasional use.


But when family moves in for a few months, things change a bit.
What I had read about polished nickel prior to choosing it for our guest bath fixtures, began coming true.

Polished nickel needs a bit more attention than chrome fixtures do.

See the spots and discoloration...


How about now, easier to see?


This discoloration and spotting happens when polished nickel fixtures are used on a daily basis.


This is such a pretty metal, even when it's spotty,
but preferring things to look nice and shiny I had to figure out how I was going to do.

Well, let me introduce you to my new helper, Flitz!


Flitz is a polish paste, so you know what I'm going to say next...right?
Yep, the dreaded wipe on, and then rub, rub, rub it in.
And then wipe it off, buffing to a shine...just like polishing silver.


Nope, no fun at all!
But, it really didn't take long
and
I am so glad  to have found a way to keep polished nickel clean and shiny.

Isn't this better...


Much better!

There is nothing prettier than polished nickel fixtures and I am still glad we chose it, but a little FYI if you are thinking about this finish in your bath or kitchen.

Before choosing Carrara marble we were told it was not easy to care for either,
and it was suggested that we shouldn't put it in our bath,
on the countertops, on the floor, or in the shower.
But we love it,
so we did it,
and
so far so good!

How about you, any tips to share?

Blessings,
Cindy

It's party time, so hop on over for AMAZE ME MONDAY!
AMAZE ME MONDAY


Linking with:

BATH REMODEL ~ The Good & Ugly

Monday, January 21, 2013


Originally, we planned on starting our renovation adventures
with our master bedroom suite.  If you have been following, you'll remember that
Mr. Heart decided it would be best for our first gut job to be on a smaller scale.
He is a wise man!  I had already begun gathering inspirational pictures
and had a good idea about fixtures and finishes, so we moved forward with renovating the
guest bathroom.  We were excited to start and for the most part it went
very well, though we have learned a few things along the way.  Possibly our new found
experience will be helpful to someone else, so I wanted to share a few things
about our guest bath remodel...

1) Will it be a DIY project and if so how much will you do yourself?
There are some contractors/decorators that aren't interested in being assisted.

2) Interview several contractors, get references, see their work (very important!),
agree on a price, and give no money up front.

3) Have a clear idea of what you want, time frames, etc., and communicate it well
so everyone is on the same page.

4) Discuss with your contractor/installers all of the materials and finishing touches
you are wanting, to be sure they have experience working with your material choices
and can accomplish the look you are hoping to achieve.

For us, this was not a project we wanted to tackle, so no DIY here.
We had a pretty clear vision for our project.  If assistance is needed you may want to
seek the help of an interior designer.  It would be sad to finish a remodel project
and it not be all you had hoped for.  We met with several contractors,
spoke with their references, and checked out their work, so we were good to go.

Most of my inspiration came through magazine pictures and I especially wanted
a light and bright guest bathroom.  As you can see in these next two pictures,
carrara marble makes for a light and bright bath…
(Calcutta, carrara, and statuary marble have many of the same attributes and it is often difficult to tell them apart.)

cararra bath inspiration


carrara guest bath


In the beginning, when discussing our material choices with our contractor and his son,
they informed us they hadn’t installed carrara marble before, to which we replied the only
thing we have heard is to use non-sanded grout for installation because the sand would scratch
the marble.  They agreed to check on how to install marble tile for any other installation
requirements.

We purchased the carrara for the flooring, wall tile, wall trim, the slab for the vanity top
and all of the fixtures and accessories.  Our contractor began the tear out.  We began paying
for labor and reimbursing them for materials along the way. The contractor installed the
marble flooring and it was beautiful, all light and bright.  They did a wonderful job.
The remodel was becoming long, loud, dusty, messy, and trying at times,
but overall it went very well…except for the marble wall tile installation…

On the first day of installing the wall tile, the guys were able to complete one full wall and
the commode area.  By early evening, we began to notice the tile color was turning dark and dingy.
We all thought it may be due to the marble being damp and once the adhesive dried it would
lighten up again.  As time went on we could see the tile becoming darker and darker
with shades of brown coming through. (dark arrows.) We stood some wall tiles across the
bottom of the wall to reference the original color prior to installation. (white arrows)

carrara marble darkens


carrara marble problems


By the next morning, my heart began to sink as the difference between the wall tile
and floor tile became more and more apparent.


carrara marble problem


Our contractor suggested we give it another day to dry, still hoping it was a moisture issue.
By the next evening the tile was even darker with shades of dark gray, tan and cream.
Compared to the vanity top and the flooring, my light and bright bathroom was becoming even
more dark and dingy...

bath remodel

We were all confused.  The floor install turned out beautifully and stayed true to color.
What was happening to make the wall tile discolor?  The contractor had no answers
and continued thinking it was due to the moisture still needing to dry.
But it seemed, the drier - the darker, which was not the result we were hoping for.

So, we began reading the labels on the bags of flooring adhesive and then on the
container of wall adhesive where it was quickly noticed...
“Not for use with natural stone.”
Come to find out, this product was pigmented with a cream color and the cream was
showing through.  Also, the adhesive had been applied to the back of each tile with
a notched trowel, causing a shadow effect to show through the tile.  Marble, we learned,
has to be covered completely with the installation adhesive and not applied with a
notched trowel.  So, the darkening tile was due to the contractor using the same product
he uses for all his tile installs to also install our marble tile.  
Hmmm, we wondered, what happened to checking to see what was needed for
installing carrara marble tile as was discussed in the beginning?
Oh well, the darkened wall tile was removed.  We purchased more tile which was
then installed with the correct adhesive.

This pictures shows a section of removed tile compared to the new tile that was installed
with the proper application, the bathroom was looking light and bright again...

bath remodel problems

We were glad the problem came to light before more tile had been installed.  We felt bad for
us in having to buy more marble tile and felt bad for them in their time and hard work.  So, we
absorbed the cost of the tile and they absorbed their labor.  We moved forward together,
the project was finished, and we were all very happy with the end result.

Moral of our remodel story…
They are professionals, but no one can know everything.  So, ask questions and be satisfied
with the answers.  Ask more questions, check and re-check, because you can never be
too involved in the process.  Most of all have realistic expectations.  There will be problems
and when they arise there will need  to be fair solutions for everyone involved.

Here is a glimpse of the finished guest bathroom, you can click the picture if you would
like to see the finished project...

#14

Have a remodel story you can share, if so please do!
Thanks so much for visiting, please leave a comment so I’ll know you did.
Blessings,

Guest Bath Remodel ~ The Finishing Touches

Wednesday, January 16, 2013

bath remodel  polished nickel fixtures
The guest bathroom was our first total gut job.
This remodel was long and hectic,
definitely a lesson in patience and adjusting expectations,
but most importantly . . . it was worth it!

It is a little hard to take pictures of this room, but here goes…

We chose polished Carrara marble to tile the back wall above the double vanity,
the side walls from the chair rail down,
 and also to tile the floor.

I am searching for a vanity stool but in the meantime
this $3 find I painted with AS chalk paint will do.

#15


The walls are finished in Decorator White from Benjamin Moore.


#14 - 2


The lighting over each sink is from Hudson Valley ~ Newport collection in polished nickel.


#11


We found that custom cabinetry was the most economical option for the double vanity

and used a local cabinet maker.  He was so easy to work with and did a wonderful job.


#13


We are so happy with the Rohl fixtures,
the design is classic and the quality is so nice.

The vanity fixtures are from Rohl ~ Country Bath collection in polished nickel.


#3 - 333


#2


  #4


The train rack double towel bar is from Pottery Barn ~ Mercer collection in PN.


#12


The shower curtain has just enough ruffle and was purchased on Etsy from Simply French Market... I love it!

#5


Pencil tiles in Carrara was used to frame the subway tile around the bathtub

and

pieces of Carrara from the previous bath was used to complete the niche.

#8---2


#9 


The tub and shower fixtures are also from Rohl ~ Country Bath collection in polished nickel.

We have more baths and a kitchen to remodel and will more than likely use more of their products.

 #7


#16


#22


A lace valance was used for the window treatment.

#21


I’m usually not a matchy-matchy kind of girl but I wanted the bath hardware and accessories to coordinate.  I was unable find any collections that included all the items needed, so after much searching…

~ The train rack was purchased from Pottery Barn ~ Mercer Collection in PN

~ The vanity hardware and robe hooks were purchased from Lowe’s ~ Allen & Roth in PN.

~ The hand towel and tissue paper holders were purchased from Baldwin Brass ~ Brunswick Collection in PN.

They look great together…yippee!

collage - to use! 


In case you missed it, This is how it all began...

Thanks so much for coming, please leave a comment so we’ll know you did!

For a tour of our home go here.


Join us each week for AMAZE ME MONDAY

 Like Me On Facebook  Follow My RSS Feed Add me to your circles on google plus Follow Me on Pinterest  Contact Me  Follow Me on Bloglovin  Follow Me on Twitter  Follow Me on Instagram
Related Posts Plugin for WordPress, Blogger...